Wednesday, May 30, 2012

Pressed Belly of Pork, Chile Morita Gravy & Celeriac Purée


Sometimes you have to sin.
Sometimes you just have no choice but to succumb to the powers of the belly.
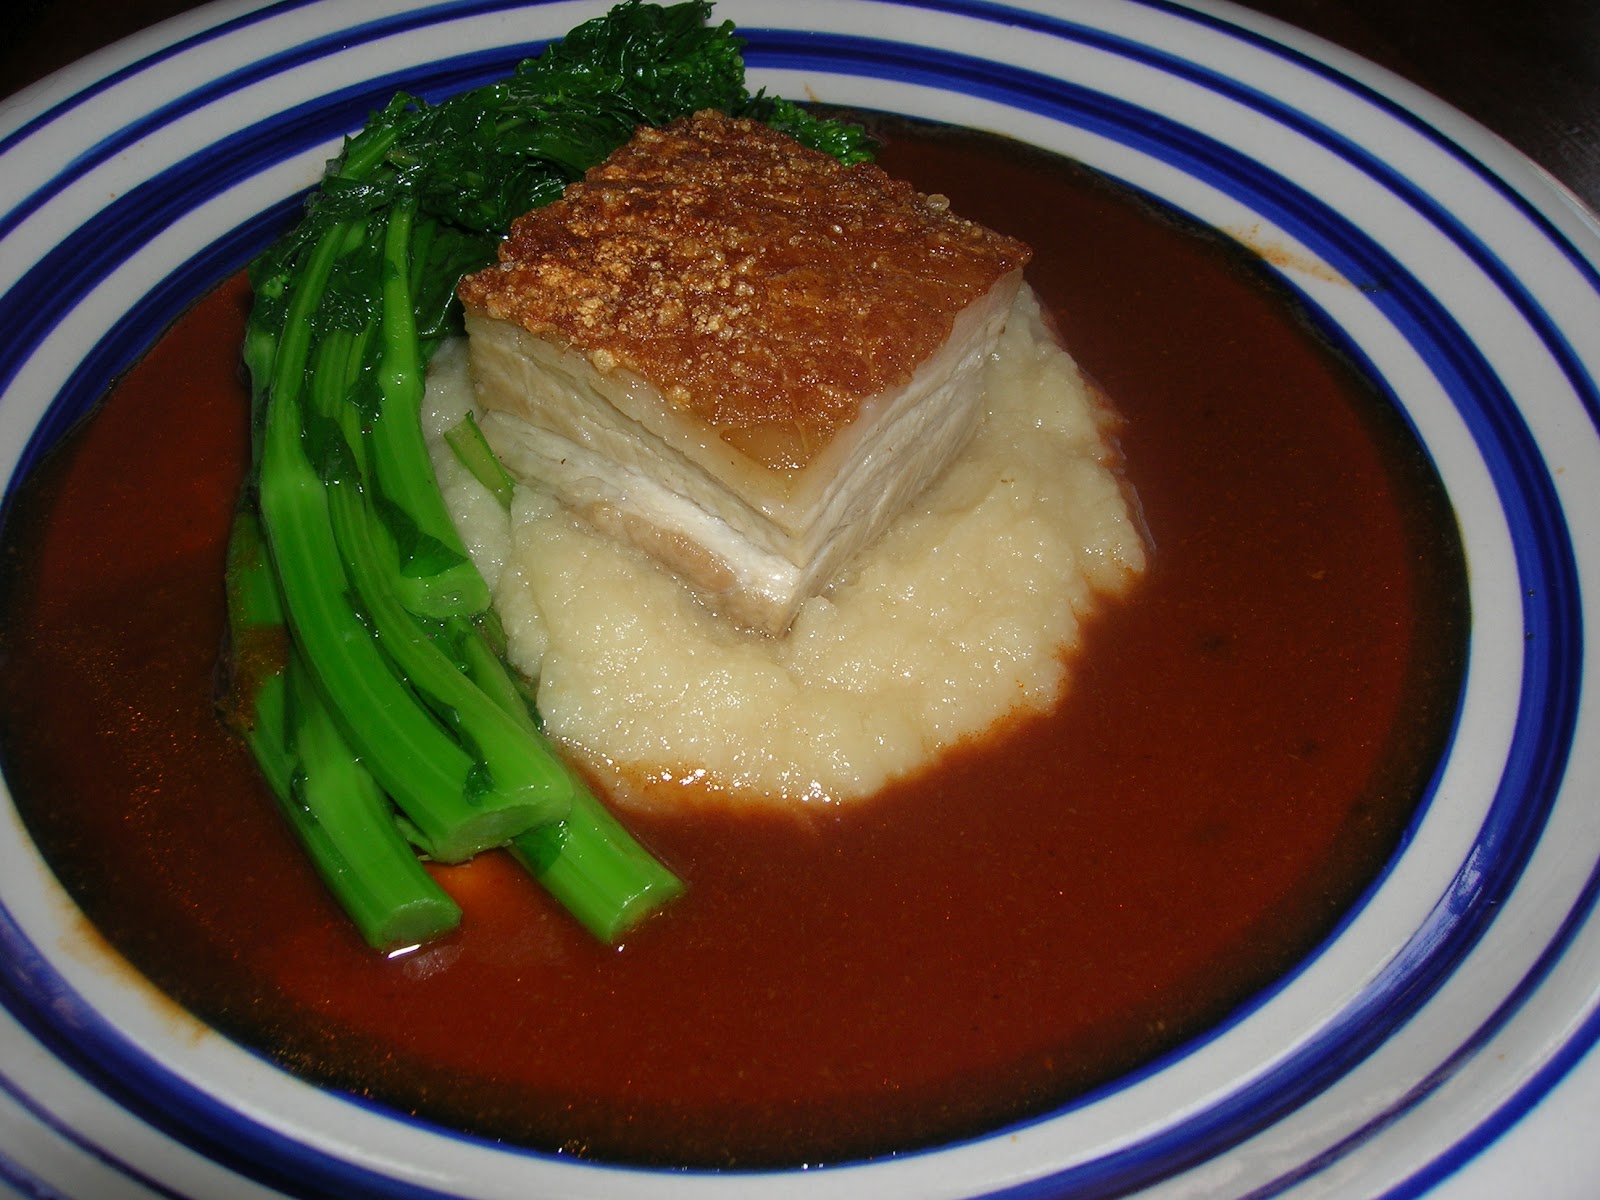
Imagine a slowly roasted and juicy piece of pork belly with a perfectly golden and crispy crackling to top it off. Serve this with a morita chile gravy, a bright and crisp celeriac purée and bitter rapini.
Yes, please.

I was watching the F Word the other day (one of the very few shows starring Gordon Ramsay that is of quality) and watched him prepare an amazing pressed pork belly recipe. I was inspired by this and have tweaked it according to my needs. My needs being whatever I had in the fridge that needed to be used up.

Think about this: pork belly is a very cheap cut of the pig and in my opinion one the most delicious. It just permeates your senses with an array of beautiful textures and flavours.

Place the belly skin-side upwards, grab a sharp knife and score throughout.
Make sure to only score the fat and not puncture the meat. Salt liberally and toss in olive oil all around.
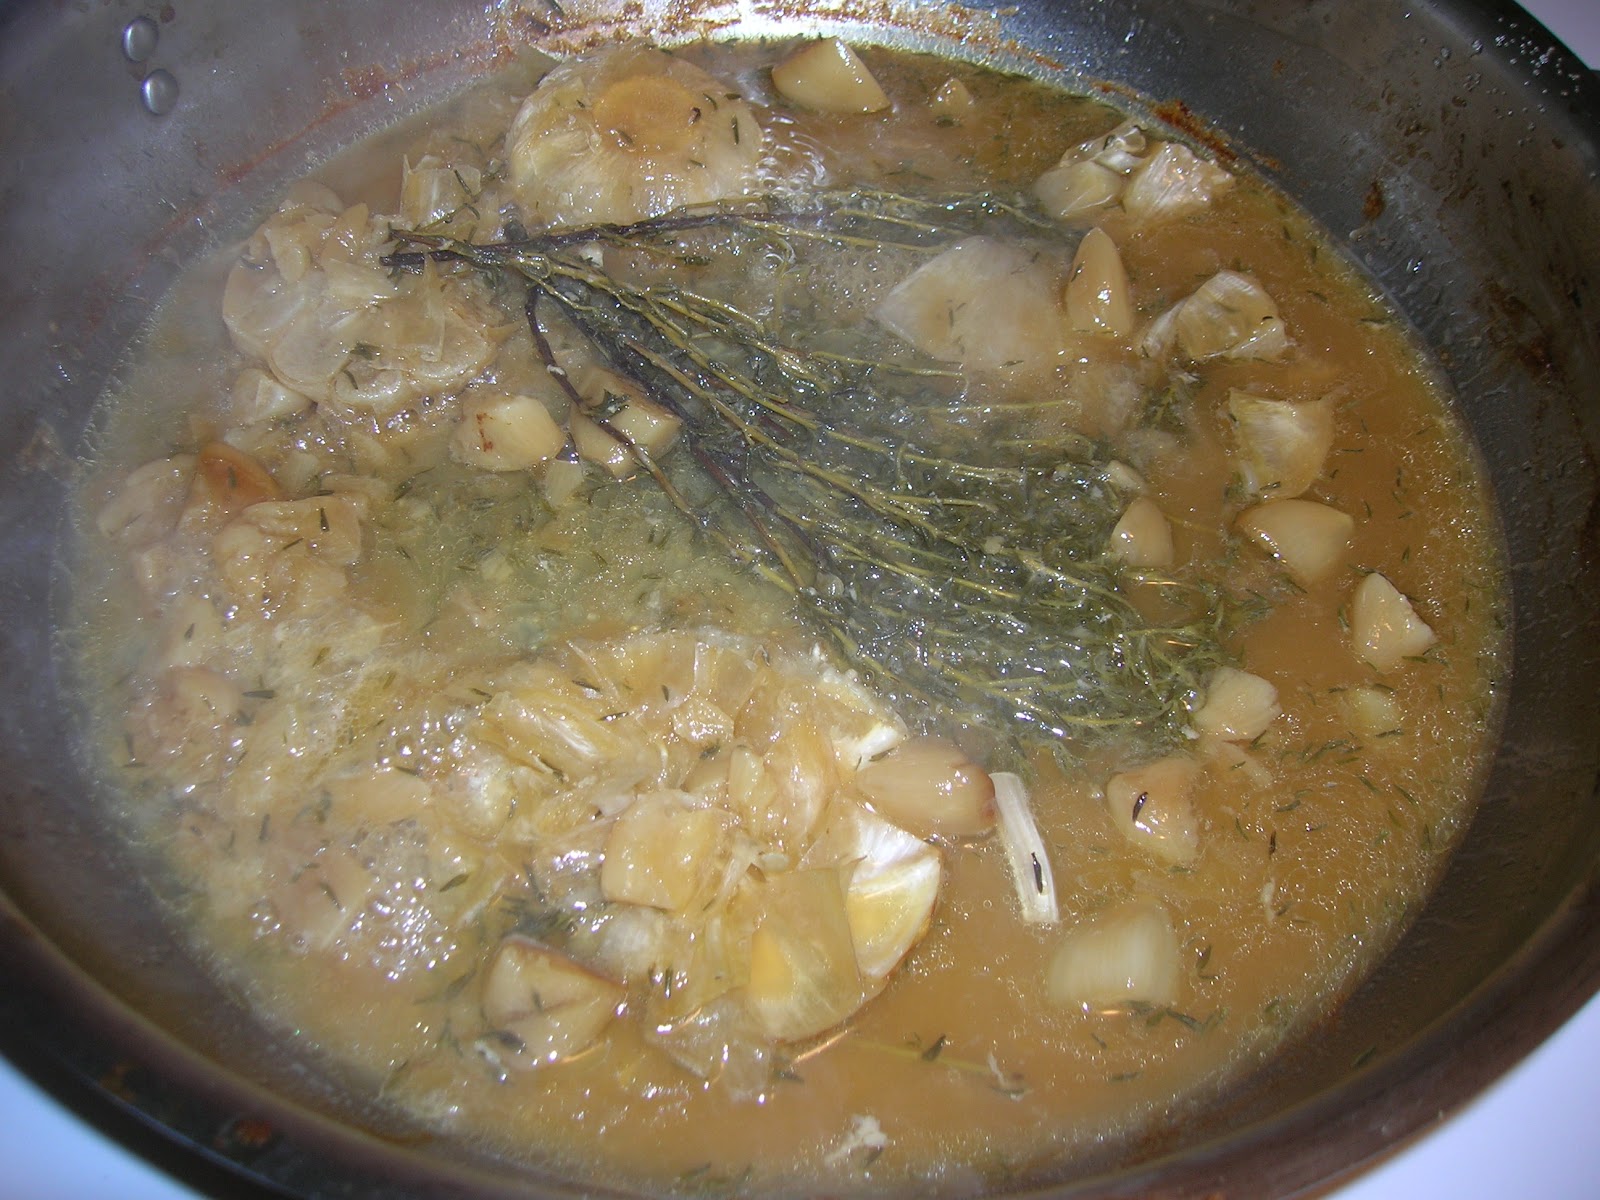
In an ovenproof pan or roasting tray cut two heads of garlic in half and place them along with some thyme sprigs. They will lift the belly from the surface preventing if from drying out.


Place the belly (gosh, I love saying belly) on top of your bed of wonderful aromatics.
Add 1 cup of white wine and 1 cup of chicken or veggie stock. Cover in aluminum.
Toss in an oven that has been preheated to 350F for 2 hours. Every 30 minutes, take it out of the oven and baste.


After 2 hours it will be succulent and juicy. Take the belly out of the pan to cool for a bit while we work on the gravy. Add 1 cup of white wine to the pan where you roasted the belly along with the thyme and garlic. Reduce, add 1 cup of stock and reduce again. Pass the sauce through a sieve making sure to press down on the roasted garlic. Refrigerate.


Place the belly in a tray and put another tray on top. Grab several cans that you have lying around to press and weigh it down. Refrigerate for 6 hours or overnight. This will allow the belly to become uniform in size and allow you to portion equal pieces.

Meanwhile, let's toast some morita chiles on a dry skillet over medium heat. You know the drill, make sure not to burn them. They are done when you can smell the addicting essential oils of the chile.


Once toasted, soften them in warm water for 15 minutes. Remove the stem and the seeds (unless you want some spice in your life), blend with equal parts of the soaking water to form a paste.
Set aside.

Next, let's work on the celeriac purée. Celeriac, also known as celery root, is a beautiful root vegetable that works great raw or cooked. It is an ugly duckling but once you slice off the peel you shall discover an extremely versatile interior that is crisp and bright. You will notice hints of celery as well as nutty notes.


Cut it's flesh in cubes, pour in stock until just covered and simmer until soft.
Place in a processor of food and blitz. Return to pot and adjust seasoning.

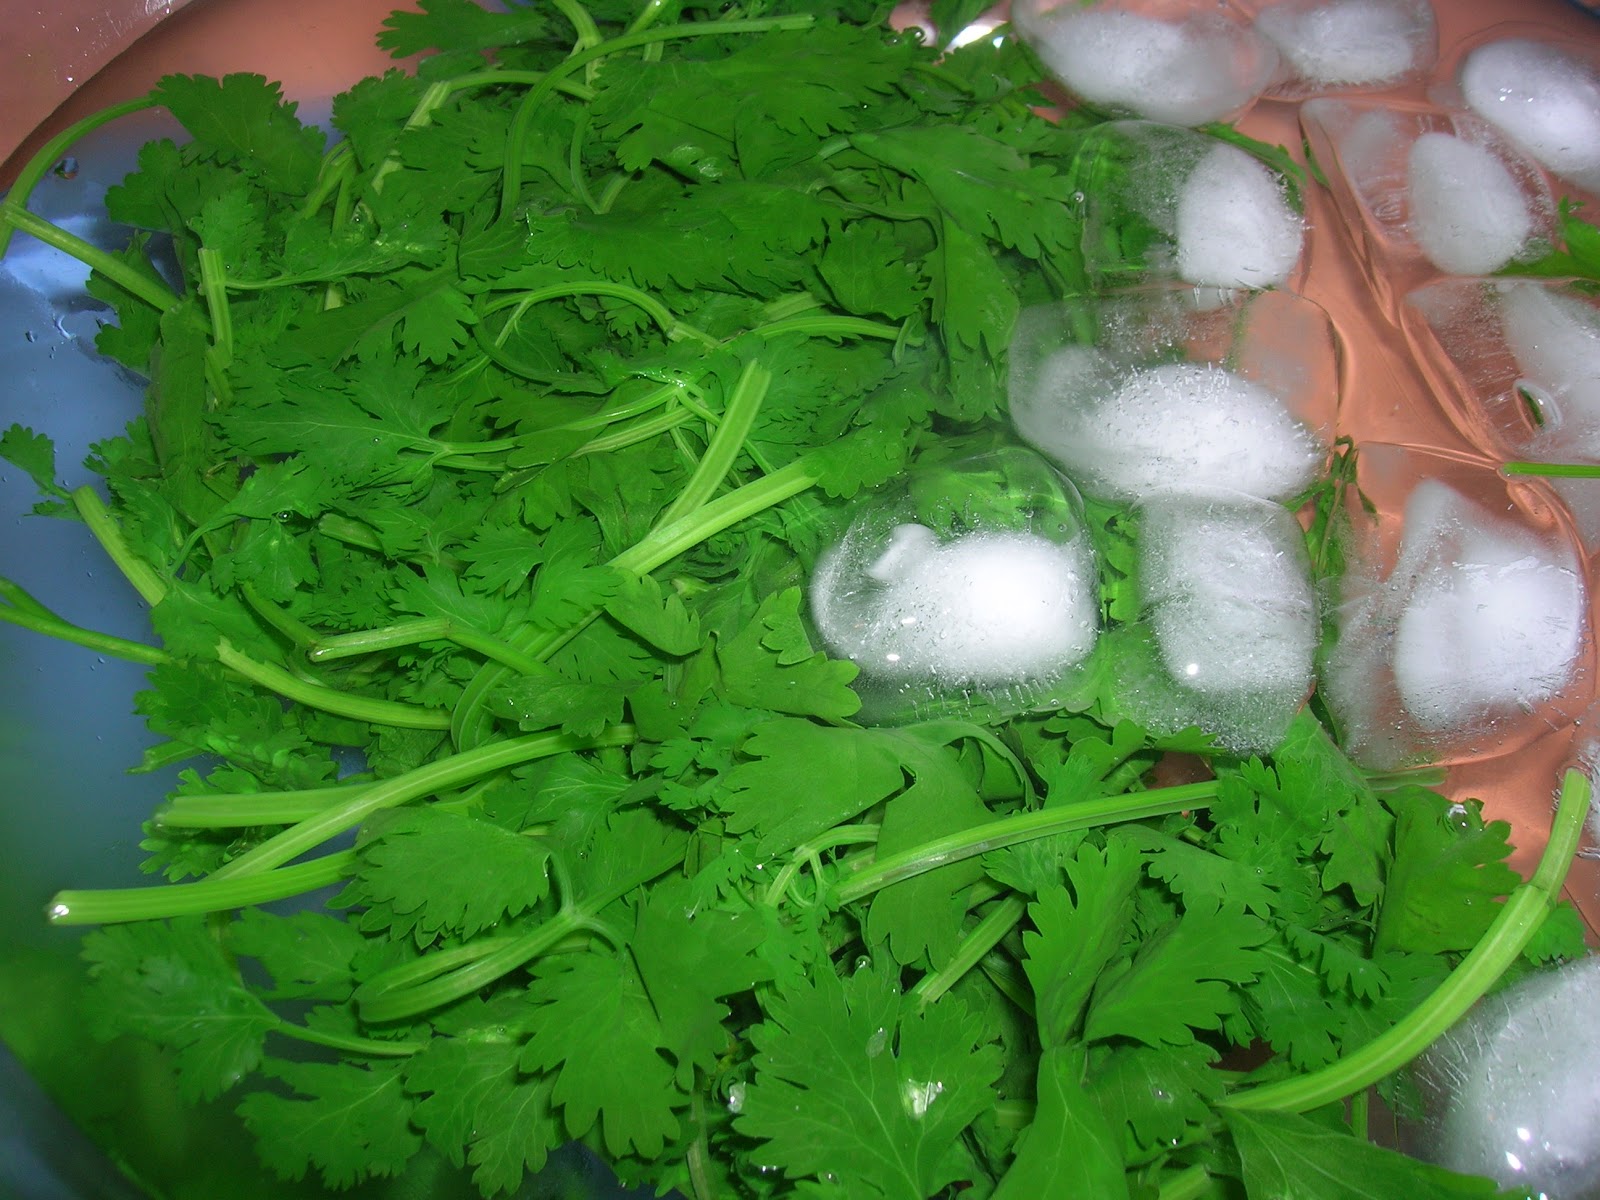
Lastly, blanch the rapini in heavily salted water. Make sure to not overcook, we want some bite to it.
No need to tamper with the rapini much as we have lots of decadent flavours working for us. Toss in some EVOO and salt-n-peppa.

After your belly has been pressed, cut into individual portions. Preheat your oven to it's highest setting. Place your portioned pieces of this flavour heaven on a roasting tray and toss in the oven for about 10 minutes. Keep a keen eye out for the skin to crisp up. This is a reminder of all that you want in life but are too ashamed to admit to yourself.

Remove the sauce you refrigerated.
Skim the fat that has surfaced and place in a pot over medium heat.
Add 1/2 a cup of the morita chile paste.
Reduce until thickened.

Listen to Primus before plating, it shall be very appropriate. Especially if you own the quintessential 'Pork Soda' Album.
Ironically my favorite Primus song is: http://www.youtube.com/watch?v=xN-DNcqYUcY

Grab yourself a plate and add a spoonful of celeriac purée. Place a perfect square of everything that is right about life (pork belly), pour the morita chile gravy and add the rapini.

You will rub your belly as you eat this belly, trust me.
Heck, you'll even want to rub my belly in gratitude.

Monday, May 21, 2012

Chile Poblano and Roasted Garlic Soup


All I'm saying is pretty baby. La la la love you, don't mean maybe.
Yes, I'm pretty sure David Lovering was singing this song about my soup:
http://www.youtube.com/watch?v=3WYd0GYrSag&feature=related
And now you can sing it too.

Roasted poblano chiles and garlic, enough said. Two of my favorite ingredients fall in love, procreate and deliver this nutty, mellow, sweet and smoky soup.


Poblano chiles are used in a great variety of dishes back home; they are most likely known for their stuffed version in the rest of the world. The darker their colour, the richer their flavour. They are sweet and mild though unpredictable as the odd one can pack a punch. It's like a game of chile roulette.

Essentially we want to soften the flesh, enhance the flavour and peel the pesky outer skin.
This can be done by blistering them over a high flame on a gas range stove or bbq. An oven works fine too. Since we are roasting garlic, we might as well do them in the oven.
Preheat your oven to 400F. Toss 4 poblano chiles in a bit of olive oil, put them on a tray and in the oven. Make sure to flip them so they blister evenly throughout.
After 20 minutes or so, they should look like this:


It is important to immediately put the chiles in a plastic bag or in a bowl with a towel on top for 15 minutes. This will sweat the chiles and make your life easier when it's time to peel them.

We should also prep our garlic beforehand so we can toss them in the oven as soon as its preheated. They can take up to an hour to roast, but oh deary, it is so worth it.
We need 3 heads of garlic for the recipe. If you have more hanging around feel free to roast extra and use them for a million and one other things in the following days. They make excellent Bar Mitzvah gifts.

This is quick and simple:
Peel excess skin of the bulb, leaving cloves intact.
Cut around a 1/4 inch of the top of the bulb as to expose each clove.
Drizzle olive oil over exposed cloves in a generous fashion.
Wrap in aluminum and in the oven.
Invite your friends over to smell the enchanting scents of garlic roasting in your kitchen.

I discovered a very practical and aluminum paper-saving way to roast larger quantities of garlic bulbs on-line. Put them in a muffin tray, drizze oil and use just a little aluminum to cover the top. Will wonders never cease?


Remove from oven when they have a beautiful golden hue. Though you will have to fight through a great ordeal of temptation, allow your vampire-killing muffins to cool before you handle them.


While they cool give your chile poblanos a facial and peel them.
Discard stem and seeds.
Separate 6 slices for garnish.
Coarsely chop the rest of the chiles.
Toss the slices in EVOO, white wine vinegar, and sea salt.
Leave to marinate while you finish the dish.

In a pot with a little knob of butter, sweat a large finely diced shallot. Once translucent, add the chopped chiles and sweat 5 minutes further.
Add chicken or veggie stock. Just enough to cover the chiles and shallots.
Simmer for 15 minutes.


In a blender add all ingredients including the roasted garlic plus the zest of half of a lime.
The zest is important; it will add a needed bright note to the soup.
I don't have a functional blender so I used a food processor. Liquid spills in food processors.
Here is the gratuitous blender shot, I know this is the real reason you visit the blog:


Once blitzed, transfer to a pot and simmer.
Add more stock if you think the soup is too thick.
Adjust salt-n-peppa to taste.

Before serving, you can stir in 1 Tbsp of heavy cream. Your soup will have a richer consistency and a velvety finish. Ladle onto your bowl and garnish with your marinated poblano chile slices. Sprinkle some toasted sunflower seeds as they will add a nice bite.
Drizzle a few drops of extra virgin olive oil and you're done!

You will la la la love this soup and at the very least convert your enemies into frenemies.


Sunday, May 13, 2012

Roasted Cornish Hen, Epazote and White Wine Broth


My friend Luke Winter came over for dinner several days ago. Besides his deep love for haggis and eggs in a basket, he also has an affinity for photography. He is quite the talent actually, you should check his work out: http://www.dyroxy.com/photos/
He also took the photos for today's post.
Unfortunately for Luke I wasn't going to stuff a sheep's stomach with heart, liver and lungs. What I did have though was a  perfectly succulent roasted cornish hen that I most lovingly massaged with compound butter and accompanied with an aromatic epazote and white wine sauce.

First off, preheat your oven to 450F.  Next, rinse your hen and pat it dry.
Let's work on that compound butter which is nothing more than butter with supplementary ingredients. Make sure your NON-SALTED butter is room temperature. Mince two cloves of garlic, a bit of ginger, a 1/4 cup of cilantro and the zest of 1 lime. Mix with the butter until well incorporated. 

Now to the fun part where we get to massage our eager hen. Carefully separate the skin of the hen from the breast without tearing it. I used the back of a spoon and that worked just fine.


Once that's done, carefully massage and spread the compound butter under the skin until you cover most of the hen. You can practice your massaging on a loved one prior to this step if you're lacking confidence. Butter is optional.

Salt & pepper the cavity, add some crushed garlic cloves, thyme and lemon slices.


Slice some carrots, toss in olive oil and Salt-N-Pepa. Listen to this at the same time: http://www.youtube.com/watch?v=4vaN01VLYSQ
The carrots will act as a bed for your hen. The idea is to allow some separation from the pan to allow the skin to get crispy and brown all the way through.
Place in a pan or tray along with the hen. Rub some oil on the skin, salt-n-pepa, and mexican oregano. Mexican oregano has a more savoury and earthy flavour that will pair nicely with the epazote.


I was completely mesmerized by Luke's tales of castles and ponies that I forgot to tuck in the wings to prevent them for burning. They didn't burn, but you should still tuck them in. If you have some twine you can also tie the legs to compact the bird and allow for even cooking. Honestly, the hen came out very nicely without this but it certainly won't hurt for you to do it.
Toss it in the oven and after 20 minutes, turn the heat down to 400F. It should take around one hour to cook. You can pierce the thickest part of the thigh and if the juices run clear, your golden.

Every 20 minutes or so, take your bird out and baste it several times. This will maintain it plump and juicy.


While your bird is dancing to salt-n-pepa in the oven we can start our epazote sauce.
Let's talk about epazote. It is an herb native to Mexico which has a strong aroma that resembles fennel or anise, on steroids. It is also used for medicinal purposes, especially for stomach ailments. 


Start by finely dicing onion and garlic. Sweat them with a bit of butter and toss in the gizzards and the neck. There's no way you should throw them out, they will add mucho sabor.
Once this has sweated add a 1/2 cup of white wine and reduce, add a cup of tomato sauce along with the epazote and a handful of cilantro. Simmer for 15 minutes,  remove neck and gizzards, blitz and strain.
Return to a simmer, pour in a splash of cider vinegar and adjust seasoning. Right before serving add a Tbsp of heavy cream to thicken the sauce and give it richness.
Let's recap:


Once your bird is finished, let it rest for 5 minutes so the juices settle. You will find your carrots to be beautifully caramelized. Ladle your epazote and wine sauce, place some carrots and the hen.

Under the nicely roasted skin you will find gorgeous steamed herbs from the compound butter. It's like unwrapping a Christmas present. Luke said the experience was much alike undoing a bra for the first time. YOU BE THE JUDGE.


Saturday, May 5, 2012

Matehuala Glazed Ribs featuring the amazing sounds of Odonis Odonis!


You better brace yourselves for today's post my ardent devotees. I have a falling-of-the-bone rack of baby back ribs with a smokey, tangy and spicy glaze. What better way to accompany this than an ever-comforting side of creamy yuca con mojo? 
For dessert, a short interview with Odonis Odonis mastermind Dean Tzenos.
Turn the volume up on your speakers, put your favorite bib on and get ready to rumble.
Wow!

Ok, so first things first. What is a Matehuala glaze? Matehuala is a city from the state of San Luís Potosí, in northeastern Mexico. Maguey is grown to produce liquor and fibres, but it is primarily a mining and industrial center.
Several months ago, I cooked a dish similar to this for my pals Roberto and Ira. At the end of the meal Roberto decided to christen it as a Matehuala glaze. It stuck with me ever since, just like the glaze will stick to your juicy and succulent ribs.

You will need to go to your nearest Latin market (or simply to your nearest market if you already live in Latin America) and get:

6 cascabel chilis
4 morita chilis
Yuca (also called Cassava or Manioc)

You can purchase the rest of the ingredients in any other market.


Start by roasting around 8 garlic cloves with their skins on in a dry skillet. Over medium heat move your cloves around for around 15 minutes until the skins blister. Toss in a quarter onion too and let blister. Set aside and let cool.


Let me introduce you to the cascabel chili. Cascabel chili, meet my loyal reader.
Cascabel translates to rattle as the seeds are loose inside the chili. If you pick one up and shake it, surely it will rattle. Although they might seem too hot to handle, cascabel chilis are moderately hot (1,000-3,000 Scovilles). They have a nutty, tannic and slightly smokey taste.


This is the morita chile which translates to "little blackberry". They are smoked, red-ripe jalapeños, very similar to the more commonly known chipotle pepper. Moritas are smoked for less time though, allowing them to maintain a slightly fruity flavour. They can be spicy reaching up to 10,000 Scovilles.


Proceed to toast your chilis in the same dry skillet you used for your garlic and onion. It's very important to only toast the chili for no more than a couple of minutes. If you burn the flesh it will take on a bitter taste and ruin your glaze. By toasting your chilis, you will allow the essential oils to flourish. This will intensify the flavour ten-fold and fill your home with a beautiful scent.


Once toasted, you will now add the chilis to a pot of hot water making sure they are fully submerged. Soften the chilis for around 20 minutes. The flesh will hydrate and become fully pliable. 
Remove the stems and the seeds (leave the seeds on if you desire to channel Johnny Cash's 'Ring of Fire' the morning after).


Toss your chilis, peeled roasted garlic and blistered onion along with 1 cup of the soaking water in the food processor and whirl away.


In a separate pot add a 1/2 cup of cider vinegar, a 1/2 cup of white wine or rice vinegar, 2 bay leaves, 1 tsp cloves, 1 cinnamon stick and 1 Tbsp coriander seed.
Boil.
Reduce by half.
Strain.


Wash your pot or grab a new one. Toss in:
reduced vinegar (around 1/2 cup)
chili/roasted garlic/onion paste
3 cups of canned tomato sauce (fire-roasted is preferable)
1/4 maple syrup (I am in Montreal, feel free to sub for agave syrup, molasses, honey, etc.)
salt to tase
Simmer until thickened, about 1 hour. If it coats the back of a spoon, it is done.
Use a sieve to remove stray seeds and flesh.

Now we have a irresistibly smokey, spicy, tangy and layered glaze perfect for your baby back ribs.
First we are going to remove the membrane from the back of the ribs. Grab a sharp knife, tear the membrane carefully and rip it off with your hands. It is a quick process and will make your ribs more enjoyable to munch on.
If you have the time smother your rack with the glaze, cover and marinate for 8 hours or overnight.
Preheat your oven to 300F.
Tightly wrap your rack in aluminum foil. Don't skimp out on the foil, use 3 or 4 sheets to cover your ribs. Place the ribs meat side down on a tray, let it hang out in the oven for around 2 hours.

All you have left is the quick and easy Yuca con mojo. Your amazing ribs are in the oven, the sun is out, you are drinking an ice cold Rogue Dead Guy Ale, life is peachy. 

It is now time for you to listen to me.
Grab a couple of left-over cascabel chilis in one hand ready to rattle, like so:


With your other hand, you are going to press play and rattle to the beat:


Hands down, one of my favorite albums of 2012 is Hollandaze from Toronto-based band Odonis Odonis. Their sounds are addictive with surfish, punk-gazey and lo-fi tones flourishing from start to end. You should check them out too. http://odonisodonis.com/

I connected with Dean Tzenos via 2-way hologram. What, you think only Tupac can do this?
Dean is the brainchild of Odonis Odonis and one busy cat as he is currently on tour through Europe in support of his debut album.
I quickly managed to ask him some questions:

NTFY: Hi Dean, how is your first European tour going? I believe you're in France right now, any amazing food stories you'd like to share?

DT: It's Amazing! We've had some classic French dinners outside on the sidewalk which have been unreal. Boiled patatos with giant local sausage covered in liquid cheese, served with salad, wine and baguettes. Simple and awesome.

NTFY: Is the Royale with cheese just as incredible as Jules Winnfield described it?

DT: Unfortunately we've decided local instead of our usual North American truck stop routine. We almost went to McDonald's once but then decided to eat at an amazing French restaurant called Kitsch in Rouen. Kings meal!

NTFY: Tell us about your upcoming album Soft Boiled, Hard Boiled recorded by the one and only Colin Stewart. Will it be a big departure from Hollandaze?

DT: It's more of a slowburn than Hollandaze. It reveals itself over time and the production is just bigger thanks to my bud Colin Stewart.

NTFY: Let's talk tacos, describe the best taco you've ever had. Was the salsa spicy like your guitar licks?

DT: The best taco was probably at SXSW. It was just the real deal Mexican style taco. Otherwise, the new Taco Loco from Taco Bell is pretty amazing. The shell is made out of Doritos! Loco!

Unfortunately our 2-way hologram conversation got cut-off as Dean went under a tunnel in his tour bus.
Thanks Dean!


It's time to work on our tasty, tasty side dish yuca con mojo. Yuca is a woody shrub native to South America. This starchy, sweet and tuberous root is one of my favorites and very easy to prepare. Cut it in to 4-inch rounds, then set cut side down and slice downwards with a sharp knife to cut off the hard bark. Turn the round after each cut.


Cut the the bark-free yuca in 1-inch squares making sure to discard the fibrous center. Boil the yuca in salted water until fully cooked.


Thinly slice one onion, mince garlic and a thumb-sized piece of ginger. In a pan over low heat, pour in 1 cup of olive oil and the rest of the ingredients. Slowly sweat them for 20 minutes. Turn the heat off, add salt to taste and the juice of 1 lemon. Add the boiled yuca and fresh cut cilantro. Toss and mash the yuca leaving some bits whole for some texture.
That's it, your done! This slow-cooked olive oil, garlic and ginger sauce is called mojo.


After two hours your ribs should be falling of the bone. Return to oven for a little longer if not.
Remove the aluminum foil from the top and smother again liberally with your Matehuala glaze. Set your oven to broil until the sauce darkens and sticks to the ribs.


Grab yourself a plate, add a serving of yuca con mojo and your sticky and tender ribs. You will be the talk of the town as the scents from your kitchen permeate the neighbourhood. Pour yourself another glass of Rogue Dead Guy Ale and you've officially peaked in life.


I almost forgot dessert! Here you go:

Tuesday, May 1, 2012

Cilantro Pesto Risotto and King Mushrooms


You got the right stuff, baby. 
See, I always knew the New Kids on the Block had it right when talking about my cilantro and sunflower seed pesto. If coupled with a creamy risotto and some perfectly grilled king mushrooms, you have a one-way ticket to flavour town.


Lets do our pesto in advance. You will need:
2 bunches of cilantro
1/4 cup TOASTED sunflower seeds
2 cloves of garlic coarsely chopped
Lemon zest or rind avec juice
Spiciness in the form of sriracha, chilli pepper flakes, chipotle, gossip, etc.
Extra virgen olive oil (let's say 1/4 cup for the sake of measuring)
Parmigiano Reggiano by the handful (or your fav. hard cheese)

Now my dears, one of the most important steps for any pesto is to blanch your greens. This can come in the form of basil, cilantro, radish tops, you get the idea. If you want to preserve your pesto's beautiful and intense green colour throughout hard times, toss the cilantro in boiling water for no more than 10 seconds. Quickly transfer your cilantro to a bowl of some ice water.


Your emerald green cilantro will cool off in no time. Make sure to squeeze the excess moisture and toss in a food processor along with the aforementioned ingredients (besides the olive oil). 


Give the ol' processor of food a whirl while you slowly pour in your EVOO (that's Rachel Ray talk for extra virgin olive oil). Adjust seasoning accordingly: salt, spiciness, garlic, acidity, etc. Remember, you are the boss of your own pesto. Set aside.

It is time to play Mulatu Astatke Ethiopiques vol. 4, put your sunglasses on and be COOL.

Let us work on those King Mushrooms. Yes, these woodsy and meaty delights are powerful enough to reconsider your faith. Being the supreme mushrooms they are, there is no need to mess with them.
Cut them in quarters, salt and pepper, throw in some fresh thyme and olive oil.


Haven put on my fancy pants, I decided to grill them electrically. Your fancy pants are unnecessary though, you can also sauté them to your heart's delight on a preheated pan. Obtain a nice browned colour while making sure you don't overdo it. King mushrooms keep their texture quite elegantly but can become very fibrous if you overcook them. Set aside.


Let us start on the risotto. I usually do not tamper with rice meals but I got my hands on some Tenuta Castello Organic Arborio Rice. I also pondered over my leftovers from my last meal (see previous post).
In a nutshell, you can be a risotto King/Queen by abiding the law:

1. Gently sweat shallots and garlic in some olive oil.
2. Add your high-starch rice (I'm looking at you Arborio, Carnaroli, Padano) and stir until translucent.


3. Add a glass of white wine at room temperature. If your wine is cold you will shock the grain allowing it to flake on the outside and stay hard at the core. If you don't have white wine but mixed a mean martini the night before, feel free to sub for dry vermouth.
4. Stir constantly.
5. One ladle at a time pour in stock stirring constantly until hydrated. 
This stock can be from chickens, vegetables and/or chickens that like vegetables.
6. Refer to step #4.

Ultimately you are searching for a creamy, unctuous and al dente risotto.
You can loosely guesstimate about 1 cup of stock to hydrate a 1/4 cup of rice. This should account for a healthy individual portion, unless you're in Texas where everything is bigger.
Once you feel your rice has a bit of bite to it, add a lil' ol' dollop of unsalted butter and cover for a few minutes.
Let your risotto hang out and get acquainted with the rest of the gang.
I had some jalapeño/yellow pepper adobo left over along with some acorn squash. I tossed in a healthy ladle of my adobo right before I sensed my rice to become al dente along with my pre-cooked squash. Feel free to omit this last part and still be fortunate enough to try this tasty tasty treat.

My sous-chefs Pancita and Beanie recommend a 2010 Glazebrook Sauvignon Blanc to accompany the meal. Mulatu Astatke will thank you too.


Plate your decadent dish by serving your risotto followed by a healthy serving of your zesty and vibrant pesto. Garnish with an array of grilled king mushrooms and be the king of the night.